Home
“Home” changes as you prepare your project. First, Flowtomate offers to connect your website, then to finish setup, and after the first publication it shows a working overview. Open it through “Home” in the sidebar. Before you begin, sign in to the right account and choose a project using the Getting started guide. Sidebar items depend on viewing permissions.
Connect your website
If the project has no publications yet, Flowtomate is not connected to your website, and you have permission to view integration settings, “Home” opens the “Connect Flowtomate to your site” screen.
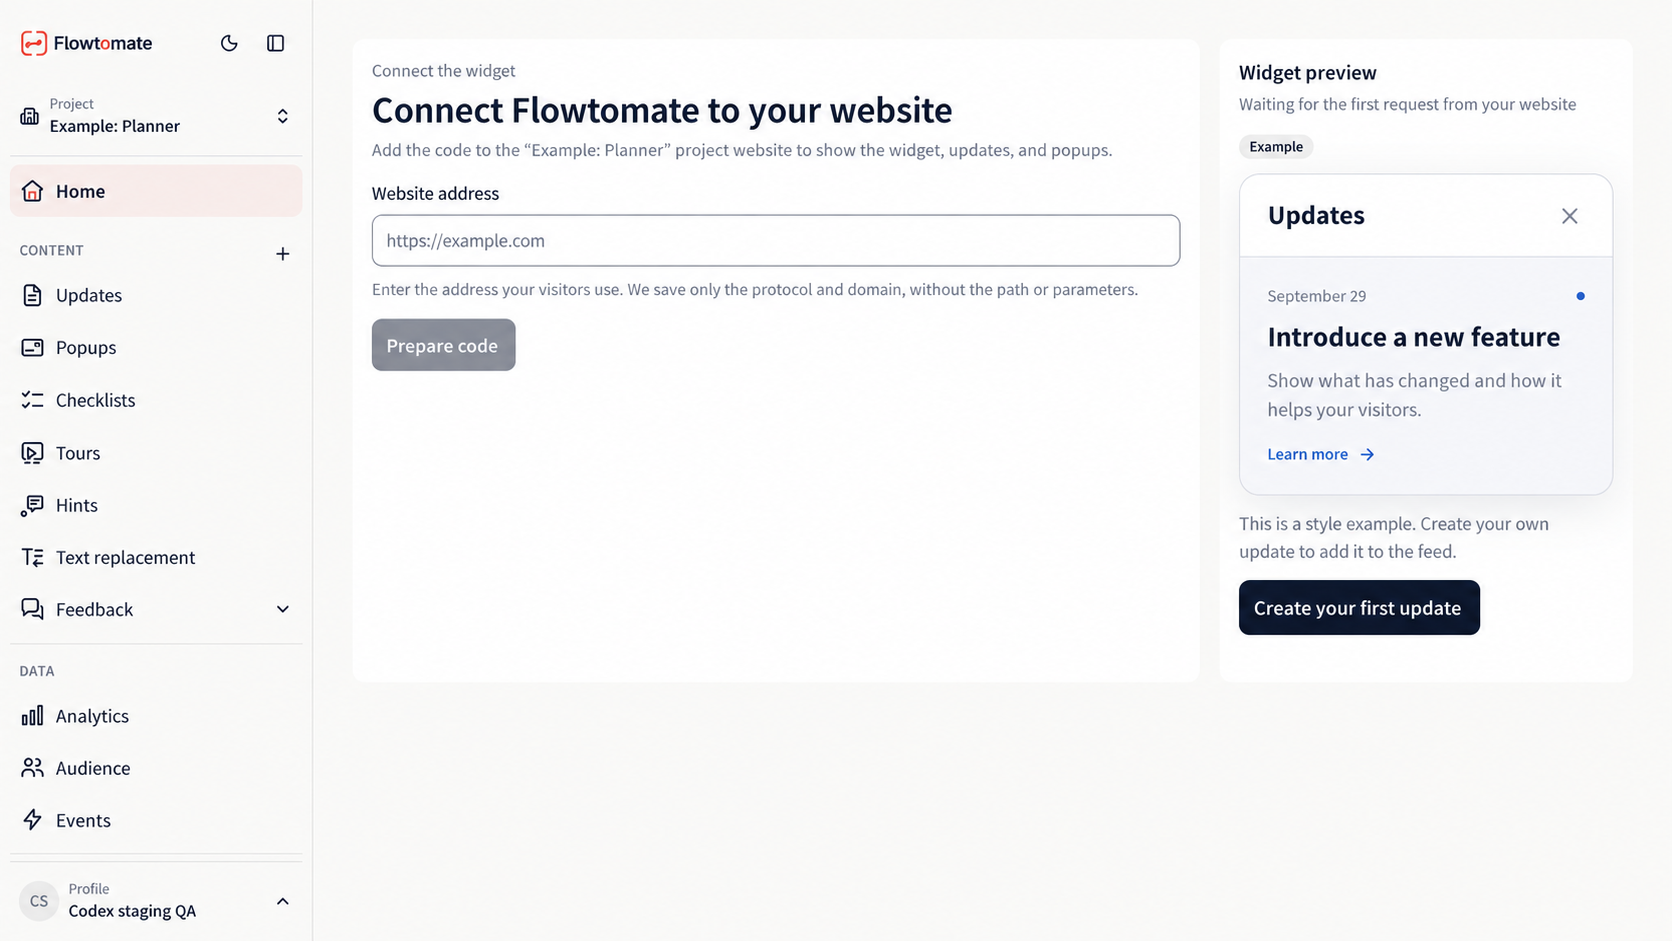
A new project before preparing the installation code. The image contains only synthetic data.
- Enter the “Site address” and click “Prepare code”. Flowtomate shows the installation code.
- For a standard website, insert this code before the closing
</body>tag on every page, publish the changes, and open the website at least once. - For Google Tag Manager, create a Custom HTML tag, paste the same code, choose All Pages, and publish the container.
- For React / Next.js, add the same script using the framework's standard approach after the document loads. Do not add a second instance when the route changes.
- If you cannot access the website's code, click “Copy instructions” under “I do not have access to site code” and send them to a developer.
- Click “Check connection”.
If there is no key yet and you do not have permission to create an integration, Flowtomate shows “Integration permissions required” instead of the installation code. Ask the project owner to prepare the code. If a key already exists, a user with permission to view integration settings can see the existing installation code.
The check makes no more than ten attempts, three seconds apart. This describes the check's current behavior, not a promise of how long connecting the website will take. If “Code not found yet” appears, check that the changes are published, that there is only one script instance, that the script loads, and that the domain is allowed by the CSP, then click “Check again”.
After confirmation, the screen shows “Flowtomate is connected”, the site address, and “Last request”. If you have permission to create content, you can click “Create popup” or “Create update”.
For example, enter https://app.example.com, add the code, and open the website's home page. After the first request, “Flowtomate is connected” appears.
Finish project setup
After connection — or immediately if you do not have access to “Integration” — “Home” shows “Get started”. The “Project setup” card contains the steps available to you:
- “Connect site”;
- “Create first message”;
- “Configure widget”;
- “Publish message”.
Each step has a “Ready” or “Not started” status. The primary button leads to the next available action: “Create update”, “Create popup”, “Configure widget”, “Open integration”, or “Continue editing”. If there is no next action, you lack the required permission; contact the account owner. A preview labeled “This is how the widget will look in your product” appears at the bottom of this screen.
Use the overview
After the first publication, “Home” opens the working overview.
- “Results for 30 days” shows “Reach”, “Engagement”, “Completion”, “Dismissals”, and “Technical errors”, with a comparison to the previous period, if you have analytics access.
- “Launch issues” shows content with no impressions or with the most technical errors over 30 days.
- “Upcoming launches” contains content with a scheduled publication date.
If Flowtomate is not connected yet, “Flowtomate is not connected to the site yet” and a “Connect site” button appear above the overview. New project members can close the introductory “You joined the project” hint with “Dismiss hint”.
The “Create” menu only shows actions allowed by your permissions: “Update”, “Popup”, “Checklist”, “Tour”, and “Feedback campaign”. If you cannot view content, “Items unavailable” appears instead of the overview. These metrics help you choose content to investigate, but do not prove the cause of a change or the effect of the content.
Code, origin, and audience collection settings are described in the integration guide.
Related guides
- Integration — configure the website code and data collection.
- Updates — create your first message.
- Widget settings — configure the entry point for visitors.
- Troubleshooting — check the connection and available sections.